How-To Series: How to Take Pictures & Videos with Your Paper Shoot Camera
How-To Series: How to Take Pictures & Videos with Your Paper Shoot Camera
We’re excited to start off the year with our “How-to” series that begins with how to take pictures and videos on the Paper Shoot Camera. It’s quite simple but we can understand why you’d be confused when you first get your camera. There are multiple ways of getting your pics and videos and we’ll go through them all below. Of course, if you have any questions, email us at info@papershootcamera.com or visit our Instagram page @papershootcamera.
How to Take a Picture: There are 4 photo filters on your camera, color, black and white, sepia, and blue. The only thing you have to do is choose a filter on the back of the camera and click the button on the front. It’s as simple as that!

How to Take a Video: There are 2 ways to do this, first with a function card, and second with a cord and a small external power bank. So, if you don’t have the video function card just yet you’ll want to use the small cord that came with your order and any power bank you might have around. You’ll connect the camera to the power bank and then switch to the 3rd filter (sepia). Then you’ll click the shutter button on the front and that’s how you can take a 10-second video. To film time-lapse videos, all you need to do is switch to the 4th filter and do the same thing.

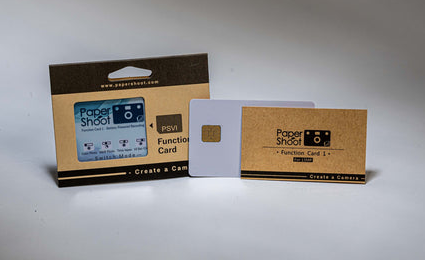
Our video function card allows you to take away the extra materials like the cord and power bank and only use your camera to take videos. Our video recording function card is only $14 on our website and will give you an easier method for taking videos. Once you slide your function card into the camera on the right underneath the SD card slot, you’ll just go to filter 3 for videos and filter 4 for time-lapse videos.


Once you’re ready to see your videos and photos, all you need to do is take your SD card out of the camera and slide it into your computer or adapter and you’ll have all your content right before you. Let us know if you have any other questions on how to use the camera or troubleshoot.


